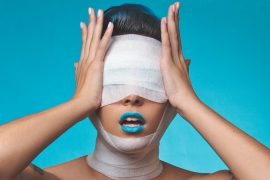
Welcome back to a new lighting recipe guide, featuring the beautiful Melissa Maciell as my model and Catherine Lindell as the amazing makeup artist. The goal for this shoot was creating two looks: one a natural, soft beauty shot and the other an edgier, more dramatic beauty shot.
Shooting in a studio can be overwhelming. There is so much equipment, so how do you know what to choose? How can you bring to life the idea that’s been ruminating inside your head? I know it may be hard to believe, but even professionals run into situations where achieving their end goal involves experimentation with different equipment and setups. That is why my biggest advice to you is to do just that: experiment.
One tactic that helped me familiarize myself in the studio was watching videos on CreativeLive or YouTube by renowned photographers who break down their setups to remove the air of mystery around them. Since that is one of the biggest ways I’ve learned, it seems only right that I share my own setups instead of gatekeeping them.
Before we break down the shots, let’s take a look at the equipment used:
- Canon 5D MK III
- 24-70mm f/2.8 Canon L Series Lens
- Tether Tools Tethering Cord
- iMac
- Lacie 1TB Hard Drive
- Pocket Wizard
- Speedotron 2403 CX (120V) Power Pack
- Speedotron 2400W Strobe Head
- Speedotron Beauty Dish with Grid and Diffuser
- 2 V-Flats from V-Flat World
- Backdrop – yellow Savage (changed to pink in post), gray Savage
- Reflective black tabletop
On a budget? Try Paul C. Buff’s AlienBee800 for lighting with their white beauty dish as the modifier and Replica Surfaces’ gloss black board.
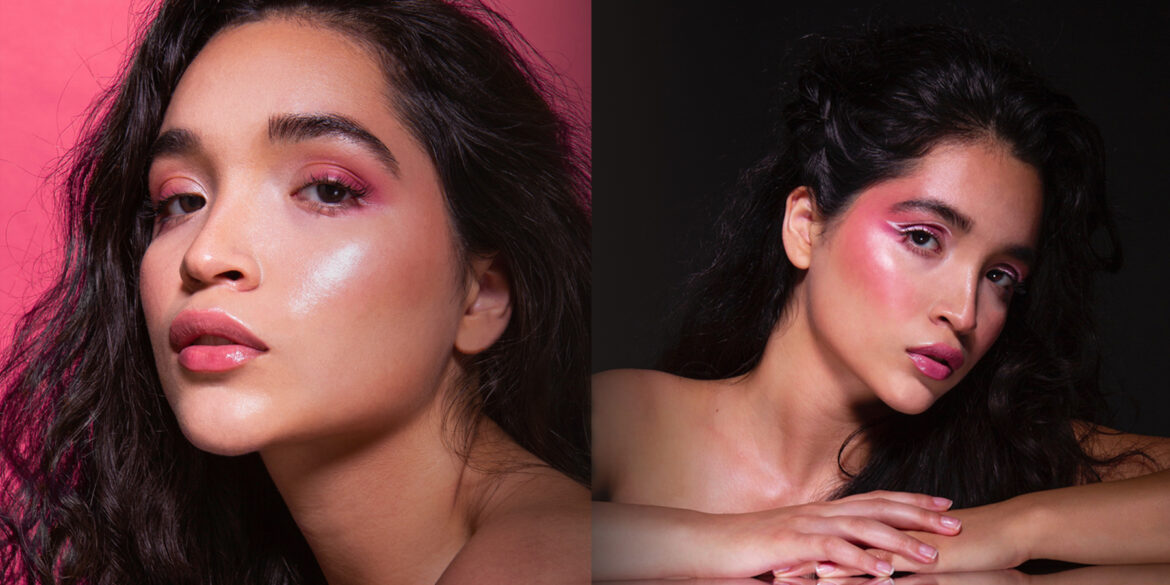
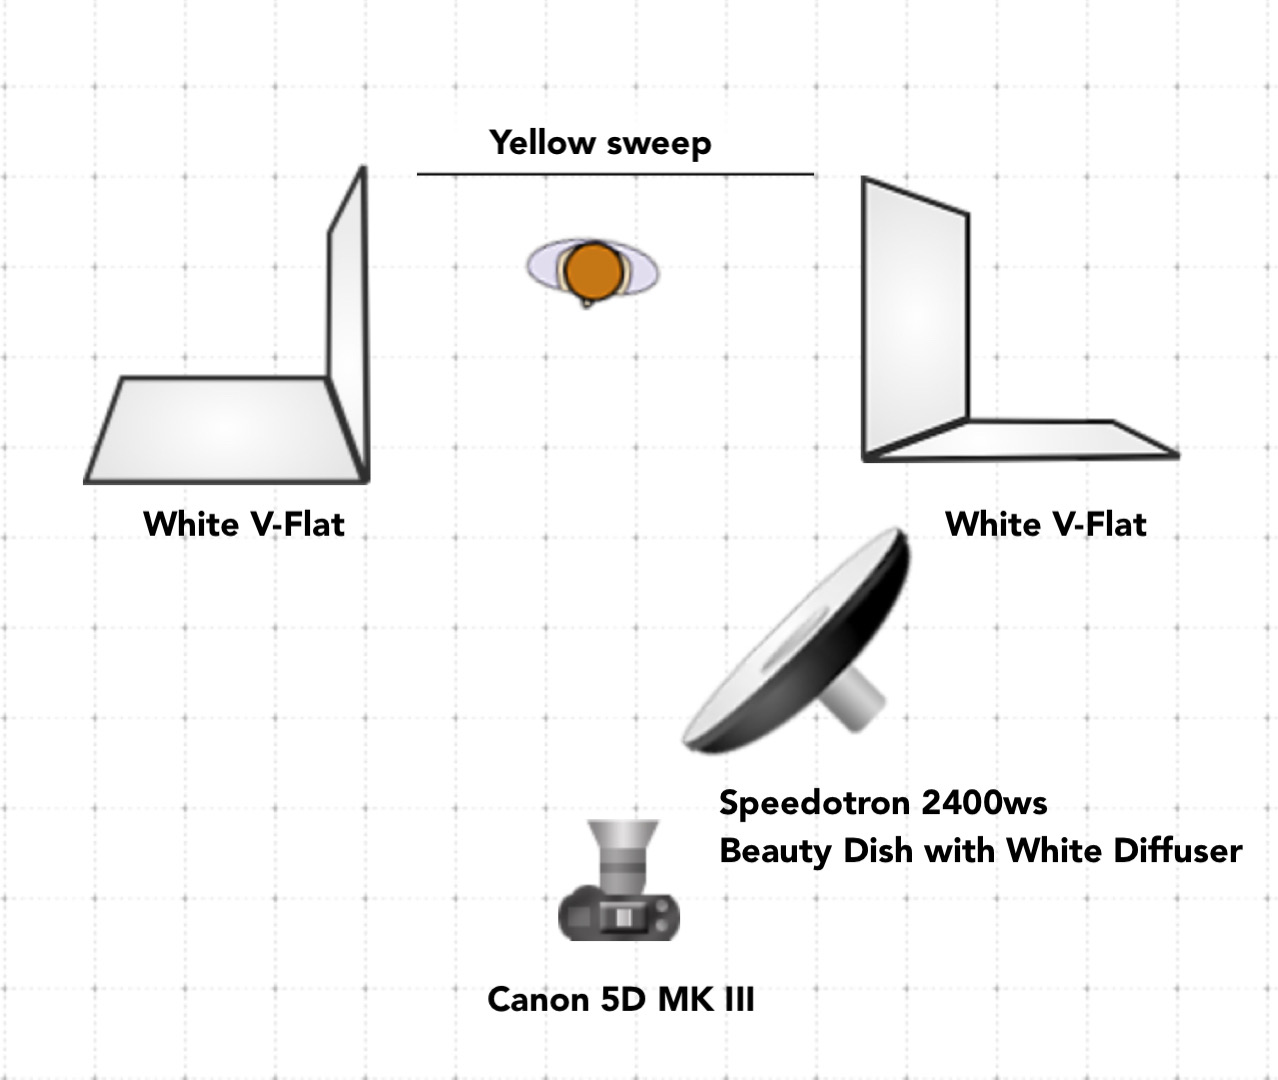
Now let’s take a look at breaking down these two images. First, here’s an image showing the set for both shots:

From that, you can get a glimpse of what the setup was like, but let’s break them down one shot at a time.
Dewy & Soft
The first setup was for a natural, very dewy look. Here’s how you can achieve this in your own shoot:

- Choose your background color. I initially wanted a pink backdrop but was unable to find that option in the studio, so my next choice was yellow. Once working on the image in post, I was able to edit the backdrop to the color I wanted. If you can choose the color of the backdrop you want, though, this is the best method to avoid an unnecessary headache. Use editing in post only as your last option.
- Have your model sit on a stool a foot or so away from the backdrop.
- Add a beauty dish modifier onto the arm of your c-stand with a white diffuser attached.
- Raise the light with the top knob on the c-stand at its maximum height. Make sure you have it angled down at a 45º angle where the light falls on your model’s face.
- Place two V-Flats with the white side facing out on both sides of the model. This helps to soften the shadows on her neck and under her eyes.
And there you have it! A clean beauty image with a sweet and simple setup.
Dramatic & Striking
Now let’s take a look at the more dramatic version. For this image, I had my makeup artist bring around the eyeshadow into the blush and increase the saturation.
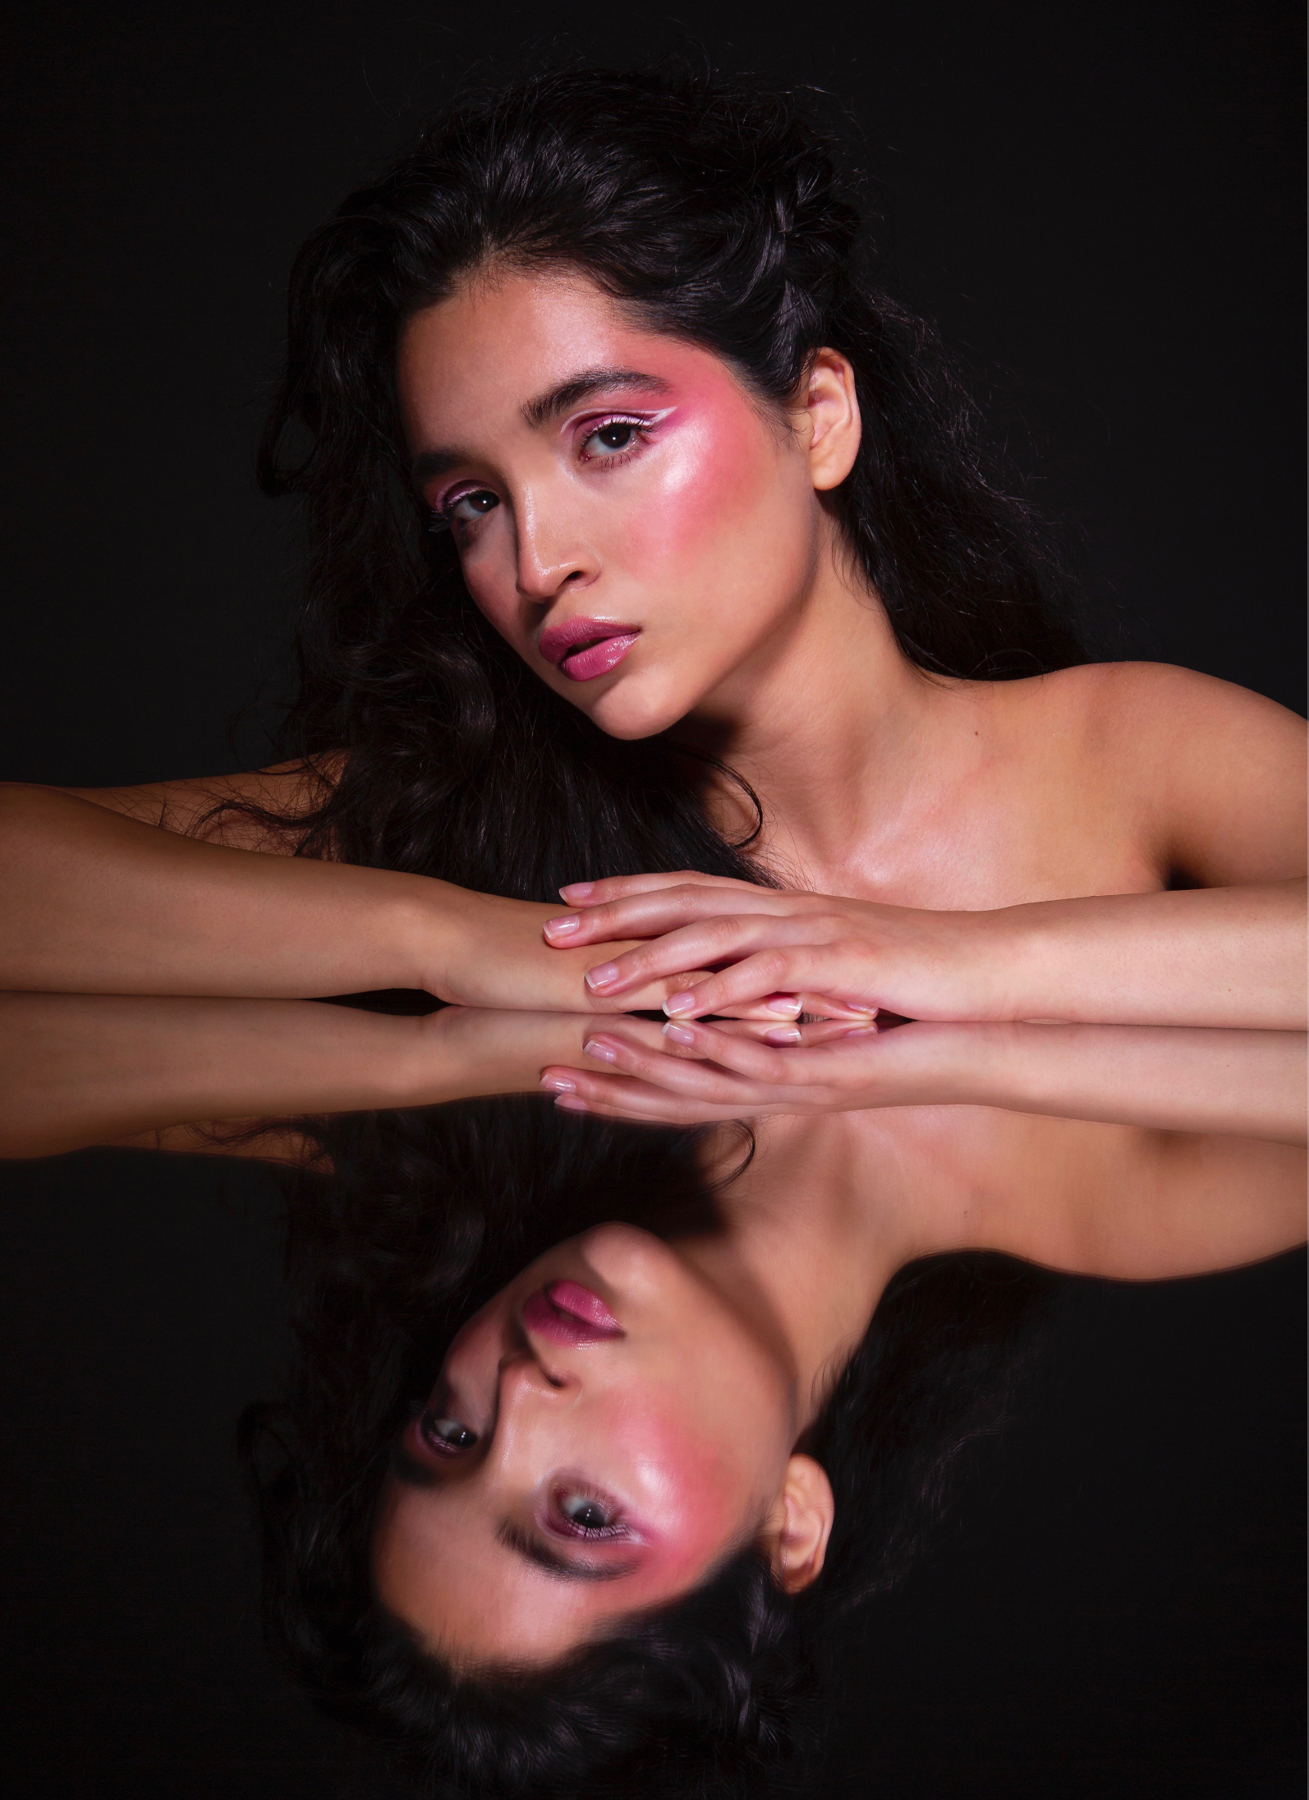
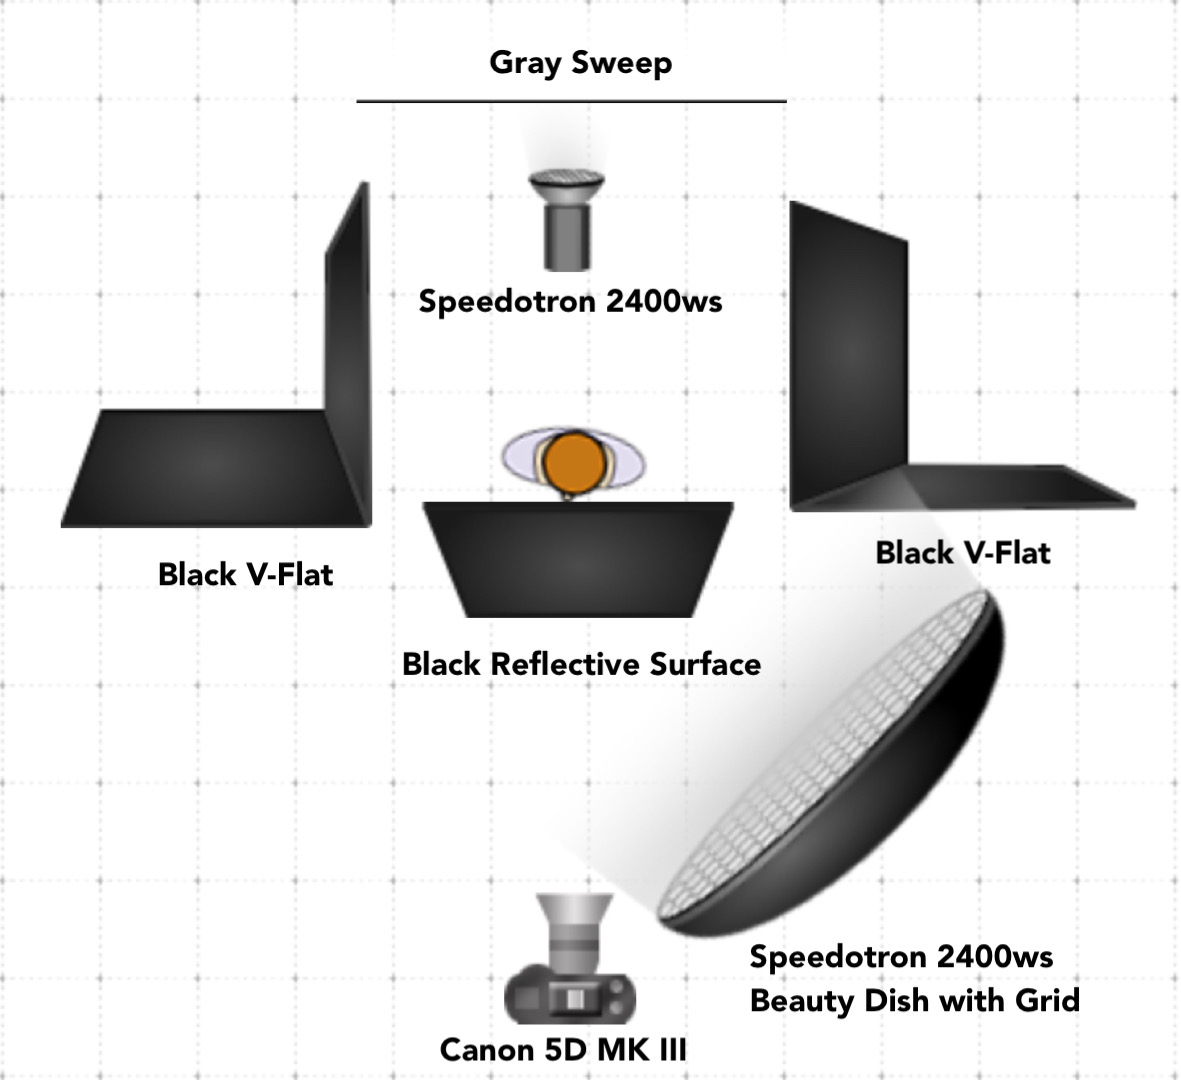
- Choose a gray or black sweep. For this shot, the model is further from the backdrop so the one light used doesn’t add light onto the sweep–it only lights the model.
- Place your model on a stool several feet away from the backdrop.
- Add a beauty dish modifier with a grid on to the arm of the c-stand for your key light. Adding a grid makes the beauty dish have slightly harsher shadows and reduces the amount of light that is spread out, into a more tunnel-like modifier.
- Raise the light with the top knob on the c-stand at about 3/4th of its height. Make sure you have it angled down at a 45º angle where the light falls on your model’s face.
- Add a second light on a baby c-stand directly behind the model. Adding this light helps separate some of the hair from the backdrop.
- Add two V-Flats on either side of your model with the black sides facing out. This creates more contrast.
- Place a glossy reflective surface propped up on two stands.
- Shoot at a low angle so the surface doesn’t warp the reflection. This also creates a soft, almost water-like reflection of the model.
And that’s it! It’s amazing how you can achieve such contrasting results with only a few differences between the setups.
Going into this shoot, all I knew was that I wanted two very different images but to use similar lighting between them. You don’t need a ton of equipment to do these setups, so go out there and try it on your own! And once you do that, keep going back to the studio to experiment with new things you haven’t tried yet. You won’t regret it.
Interested in learning more about studio lighting? Take a peek at my last guide, Getting Creative with Gels.