I started photography at a very young age, focusing on street and documentary photography for a long time. It wasn’t until I went away to college at Columbia College Chicago that I was able to expand into fashion photography, which is what I always wanted to do. I was so used to using natural light that when I took my first lighting course, I was so overwhelmed with everything. Studio lighting can be daunting, and unfortunately, many photographers gatekeep their lighting setups. It’s always been important for me to share the how-to for my work, so let’s break down three photos that utilize studio lighting and gels!
What I used between the three shots:
- Canon 5d MK III
- 1 Pocket Wizard High Speed Sync
- 1 Pocket Wizard
- 3 Speedotron 2400 w/s
- 1 Speedotron 2400w/s Power Pack
- Rosco gels
- 2 White silks
- 2 Umbrellas
- 1 Tether Tool
On a budget? Try this for lighting:
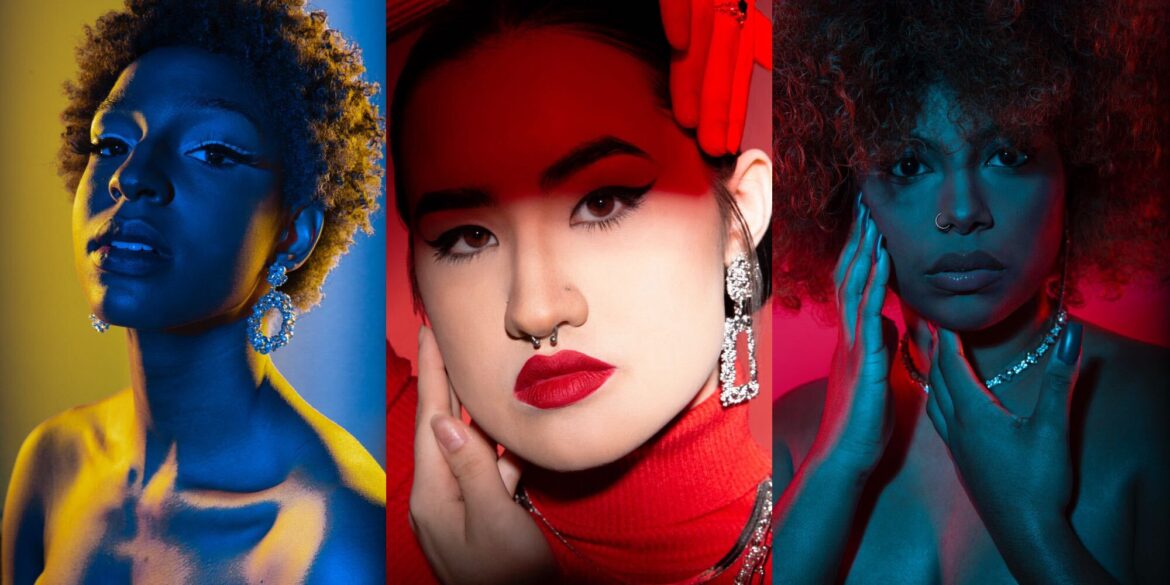
Make your subject pop by using gels as rim lights

For the first shot, we have a model in front of a white sweep with blue and yellow gels placed over two Speedotrons set to 2400w/s. You want to place your key light, which is the blue gel, behind and slightly to the left of where you’re standing to take the photo. You will raise it to be above you and angle it down on your model.
Now, let’s add in the yellow gels. Place one yellow gel behind and to the left of the model, with the other yellow gel directly opposite it. You’ll raise the stand up about a foot and angle the lights down on the model so they spill around the edges of the subject. To help diffuse the yellow gels from not being so harsh on my model, I used two silks and placed them in front of the yellow gels.
If you’re using LED lights instead of the Speedotrons, you’ll change the color of them to yellow or blue and no silks would be needed. The placement of the lights remains the same for both LEDs and Speedotrons. And now you know one new setup for getting creative in the studio. Let’s take a look at the final image:

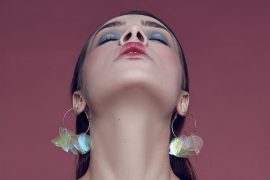
Hide portions of your subject using gels as a veil
Let’s go to the second tutorial. For this image, I wanted to use the gels and play around with how they fell on my model. I also wanted every aspect of the photo to use red, from the turtleneck to the sweep to the gel.
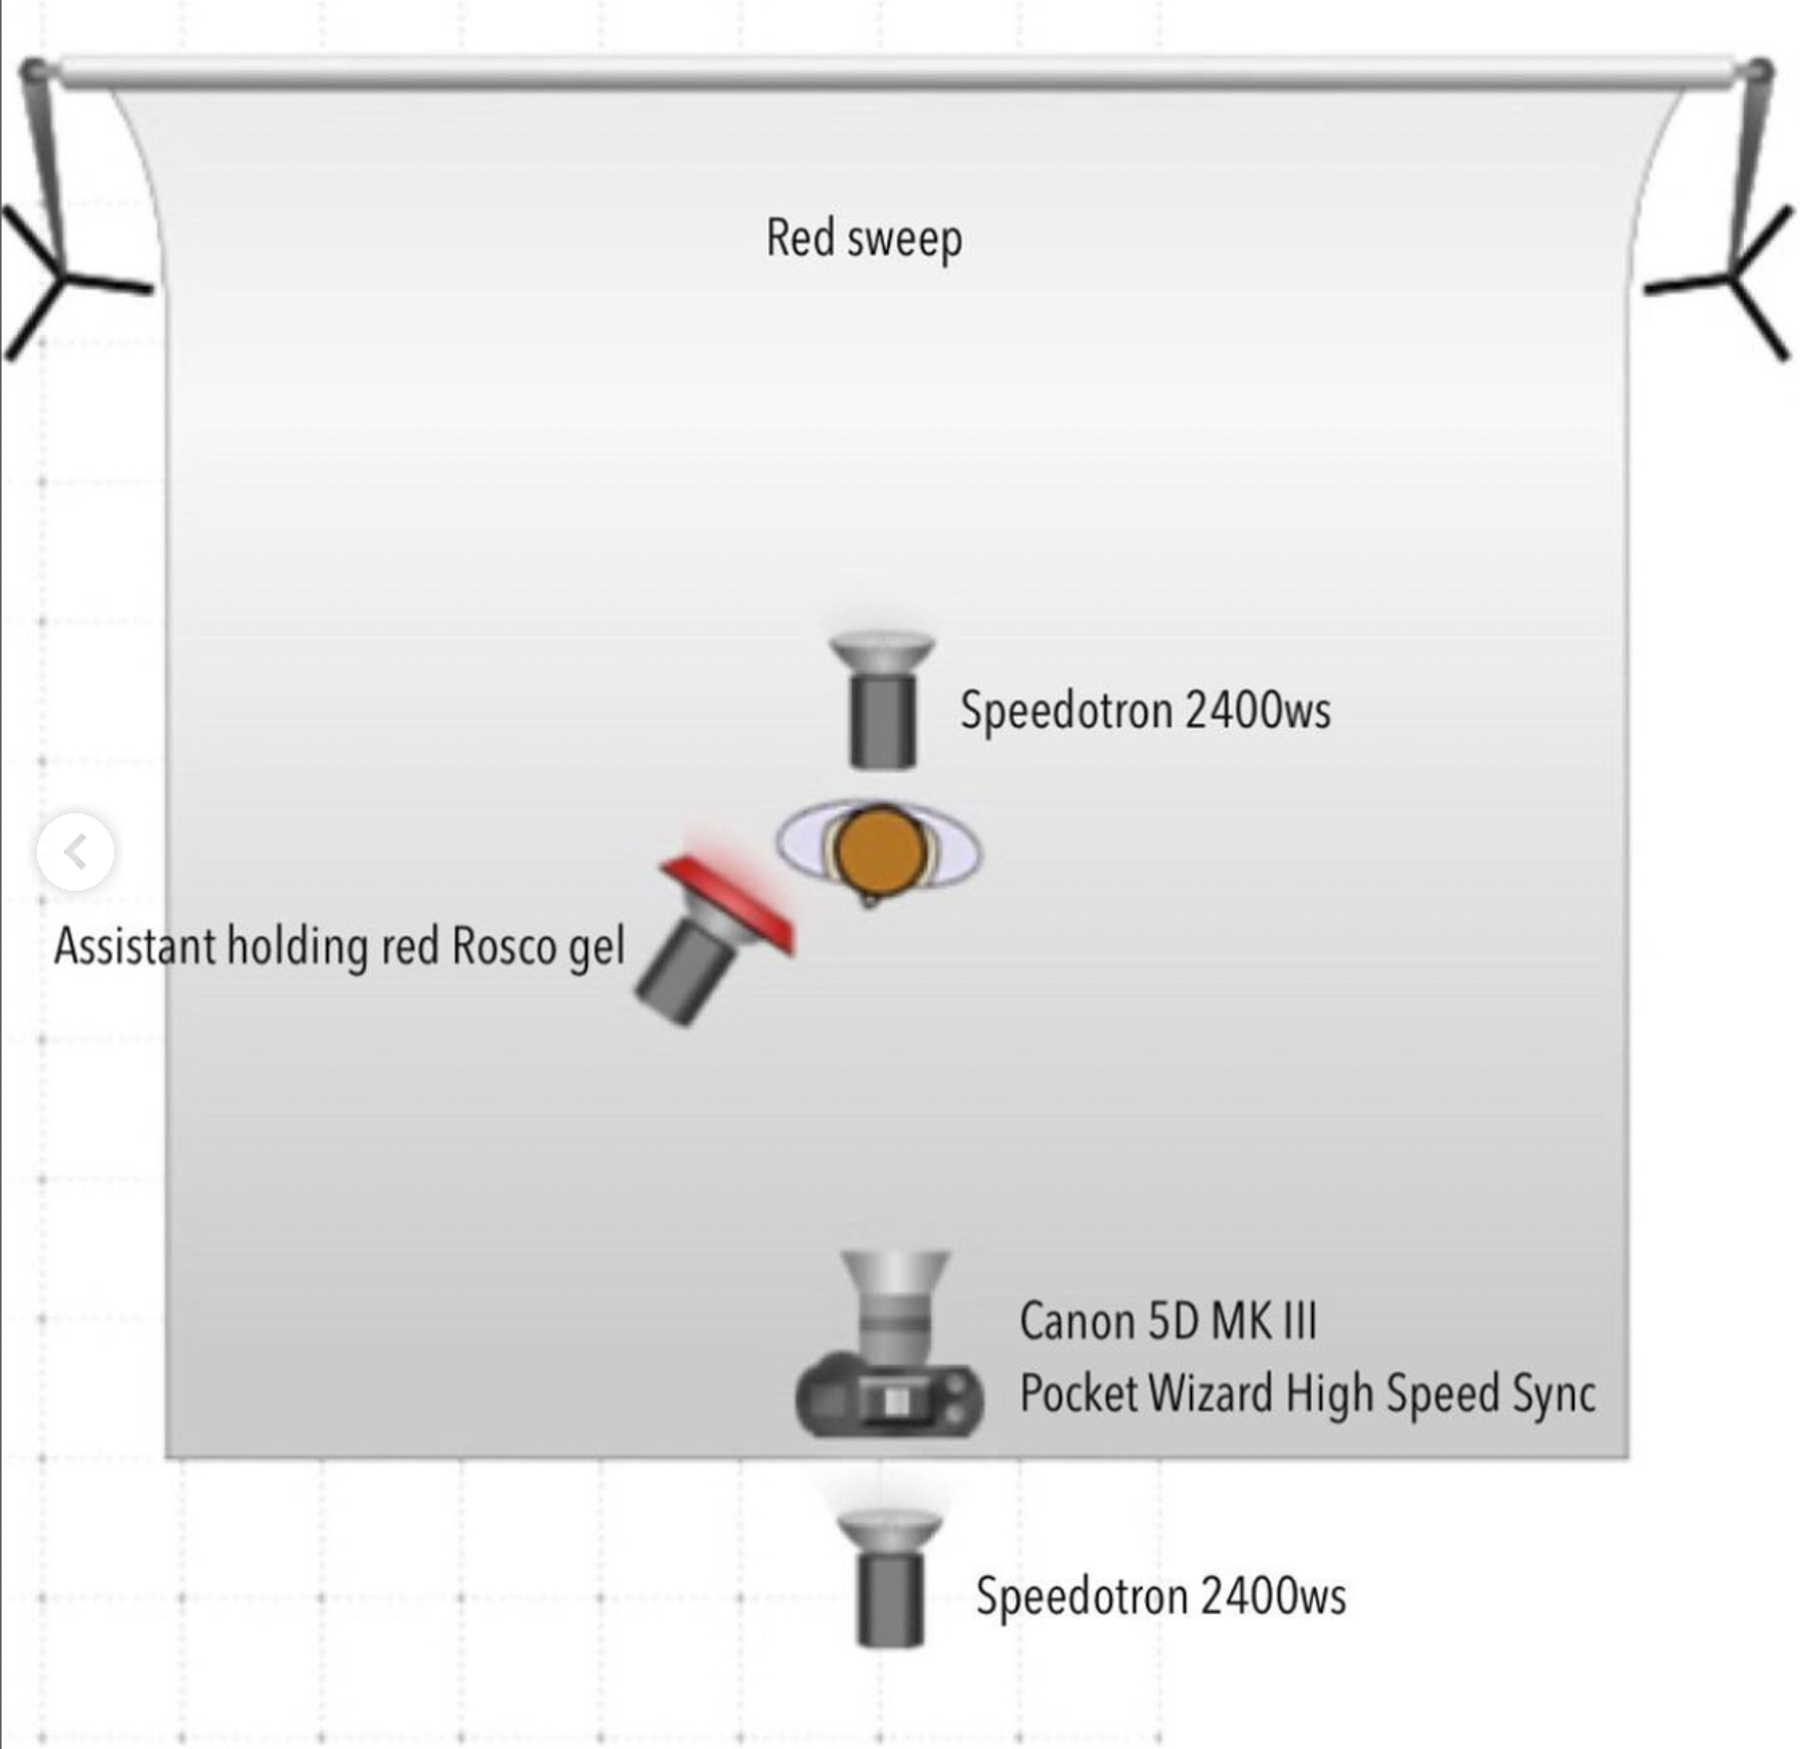
I again used a Canon 5D MK III, but this time used two Speedotrons instead of three. I had one Speedotron directly behind my model, almost on the floor, to illuminate the red sweep since I had my model further away from it—whereas in the first setup, we were closer to the white sweep so I did not need a light for the backdrop. Now for the key light: place your light behind where you’re shooting from, about a foot up, and angled down towards the model at a 45º angle.
But where did I place the gel for this image? I wanted my light for this one to be harsh and I wanted the gel to only cover part of my model’s face. To accomplish this, I had my assistant hold the red gel right by my model’s face above her head and angled down. We played around with variations of where the gel was showing up on my model, but I knew we got the shot when it covered half of her eyes.
For this one, have fun with it! There are so many ways to hold the gel to both cover and reveal parts of her face. If you don’t have an assistant, try a light stand with an A-clamp holding the gel into place. Here’s the final image:

Capture a cinematic, dual-tone look with gels

Finally, let’s get into my last lighting setup, which is my favorite. This setup also uses three Speedotrons and two umbrellas, but you can pull it off with 3 LED lights as well.
For this shot, I wanted my key light to have a teal gel. The two lights with magenta gels were positioned slightly behind my model. The teal gel light was directly above me and angled down at a 45º angle on my model’s face. Both myself and the teal light were about three feet in front of my model.
Next, I bounced the two back lights with magenta gels into silver umbrellas to make the light softer. This illuminated the white sweep into a magenta color, and also softly spilled on the sides of my model’s face, body and hair. Take a look at the resulting image:

I know how scary studio lighting can be, but I promise it’s not that bad when you’re actually using it. Once photographers remove the smoke and mirrors from how they get their shots, it’s not so intimidating. Without my professors and industry professionals sharing how they got the shot, I would be nowhere.
I hope you can take these setups and apply them to your own shoots. There is no right or wrong when it comes to using studio lighting, so experiment. Go out, shoot these examples, and share this with your friends so they can try them, too!